Sunday, May 30, 2010

some tips and tricks

I've made a few more hats since I did my original post and thought I would share a couple tips.

First, if you make your hat a little too big or if you want to make it a little roomier by making it bigger in the top but still tight at the bottom, here is a little trick.

I pinched off the excess in equal amounts on both sides of the back seam and sewed it down.

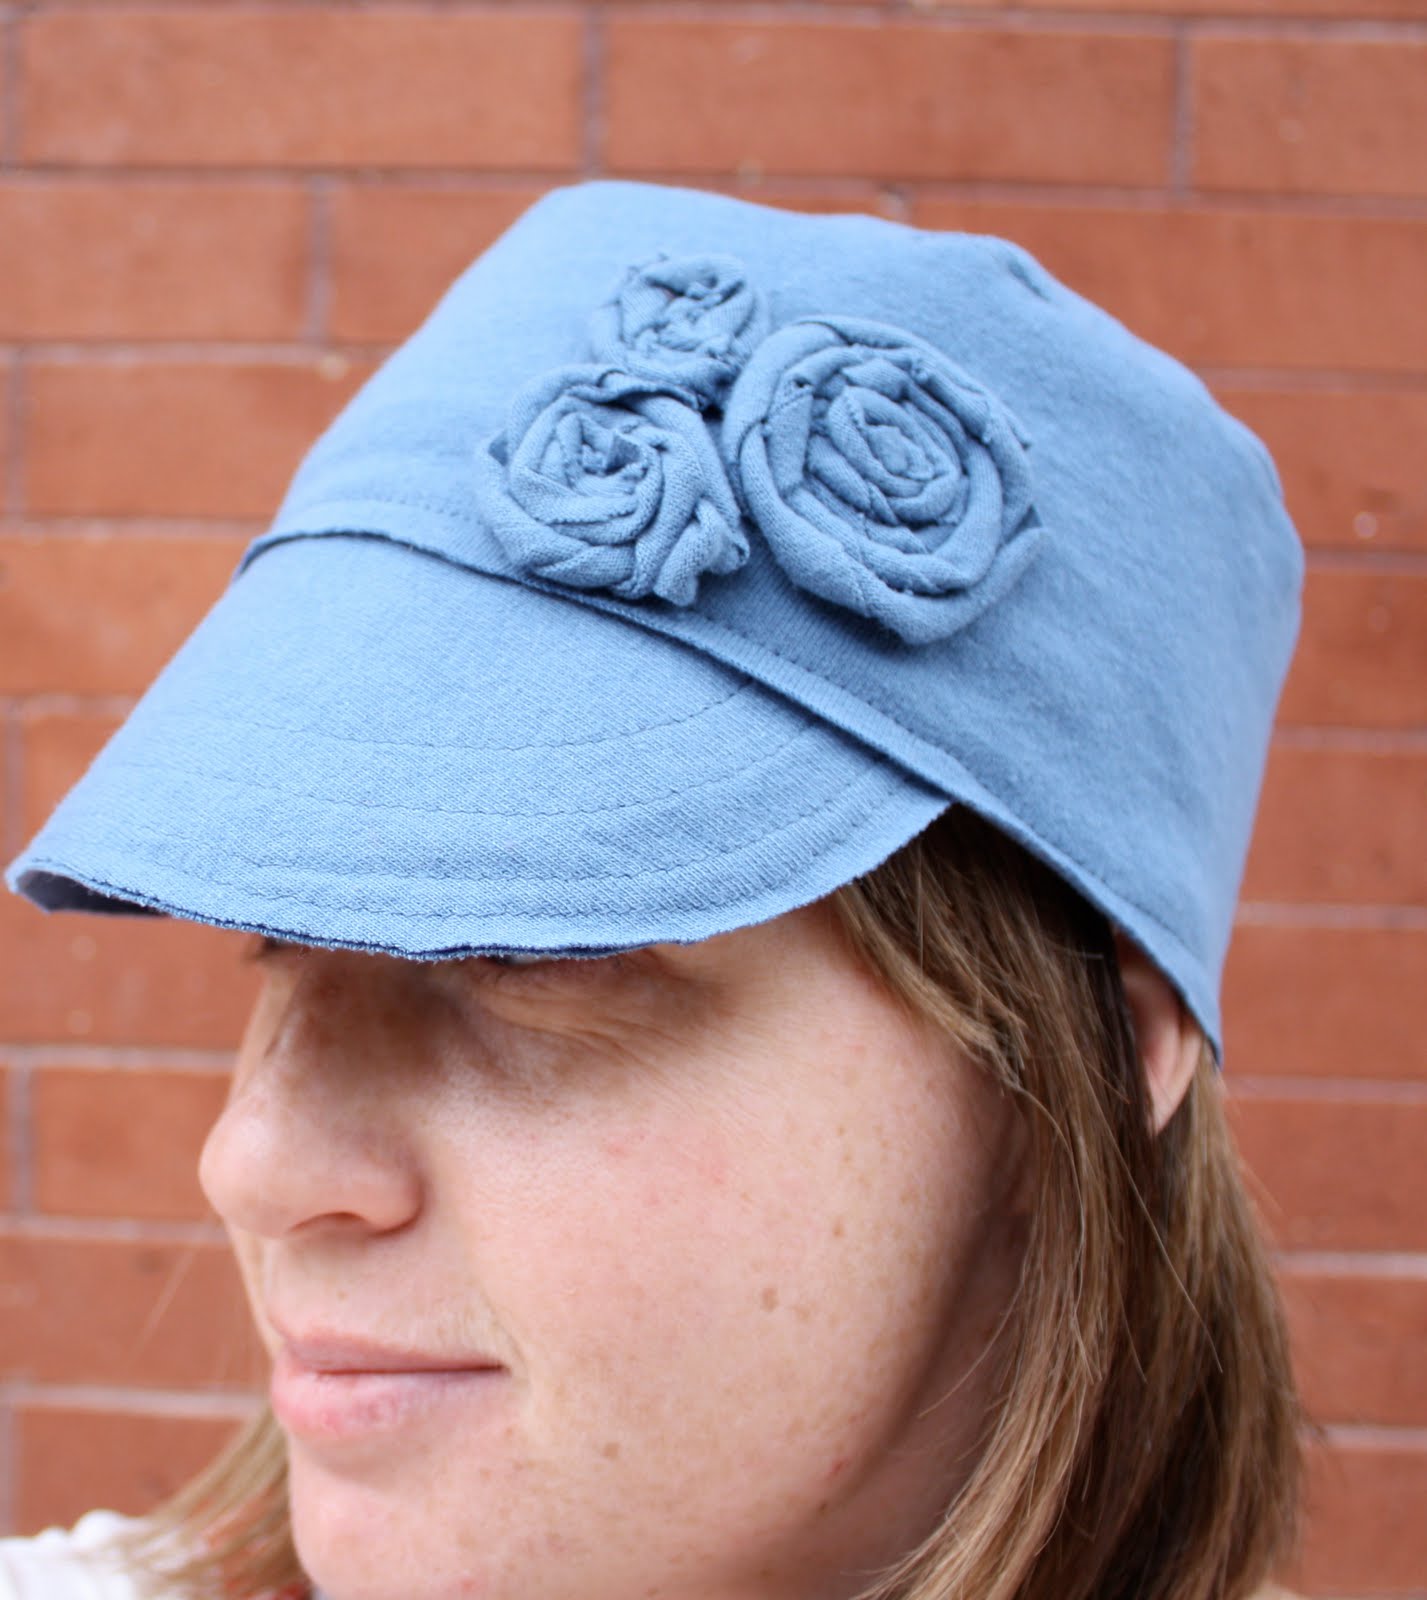
Second, I am loving adding these cute knit flowers to the hats.
They are super fast and easy.
First I cut 8 to 10 pedals. Then I grouped them in two's, and overlapped them.
then I ran a needle through the bottom
and pulled it to the end of the thread. I continued doing this till all the peddles were threaded.
The last thing was sewing a stitch into the first peddle to connect them. Pull your string tight and that's it.
I also like adding a button to the middle.
I especially like how the tips will curl.

I've loved hearing about some of the hats you've been making.

Eleanor from Zarinaia made her cute hat with a different fabric than knit. I was glad to here that could be done.
Melanie made her's using a knit skirt.
This last one was made by More that "Just Mom"

Thursday, May 27, 2010

T-shirt Hat

Here is the tutorial for my t-shirt hat from my guest post on Ucreate.

Since soccer started a few weeks ago, I've been wanting a new hat to hide my hair in the morning. I have a few hats already, but they are too dark and heavy for spring. I was thrilled when I came up with this solution and it actually worked.
All you need is an old t-shirt. I've cut several of my husbands ugly free t-shirts up this last week.
First thing you need to do is cut a long strip 4" wide though both layer of the shirt. The length will depend on the circumference of your head + an inch for the seam. I cut mine to be 21-1/2" long. *By cutting through both layers you should have two strips one on top of the other.
Now you have to cut a circle for the top. This involves a little math. Using your circumference you can find the diameter of the circle you'll need to cut.
c=d x ∏ (3.14)
So for example my circumference was 20.5" if I divide that by PIE the diameter is ∼6.5"(knit stretches a little so it doesn't have to be perfect). I added an inch to that as well for my seams. I drew and cut my 7-1/2" circle using a compass. You could also use a string tied to a pen or find a round object with the same diameter. Again I cut through both layers giving me two rounds, one on top of the other. Once they were cut, I sewed the two together with a 1/4" seam around the edge.
Next I sewed the two ends of my long strip together with a 1/2" seam, creating a very thin tube.
Then I pinned the circle to the top of my of my tube, with the seam on the outside.
I sewed around the top with a 1/2" seam, then flipped it right side out.
I made a pattern for the bill using a hat I already had. You can get the pattern HERE. I cut two layers of the bill and inserted a piece of heavy weight interfacing in between them. I made cut the interfacing to be a little smaller than the bill.
Then I sewed around the edges. I added a few more layers of stitching to make it stronger, and I liked the way it looked.
Next I inserted the bill in between the two layers of the cap. I lined up the middle of the bill with the middle of the font. The bill was about an inch and a half inside the bill when I pinned it in place. *Once it was pinned I looked in the mirror to make sure I liked the length of the bill. You can shorten it or pull it out more till you like it.
Now all that is left to do is sew around the base of the hat.
That's it for the cap. It only took me 30 minutes to make my first one. I consider myself a basic sewer and I had no problems. I love the look of the raw edges and that I didn't have to do any hemming.
For my embellishments I added flowers made with the extra pieces. I cut long strips of the knit about 1-1/2 inch thick. I twisted them and then rolled them like a lollipop.
I sewed them together by hand.
And then onto the cap.
Sometimes I get head aches from wearing a hat to long. This one was so comfortable I was able to wear it all day.
I'm kinda obsessed with making them.
I don't think I can ever get rid of an old t-shirt now.
The possibilities are endless.

Sunday, May 23, 2010

The Girly Cake

This was my daughters creation, she designed it. She was very specific about what she wanted and stood by my side the whole time telling me what to do. She wanted a turquoise cake with the purse on top and candy jewelry all over it. I think it is a good compromise between the two cakes we were looking at in THIS post.
She was thrilled with the final results.

I was running out of time and didn't know how I was going to get the handle on the purse to stand up. I had floral wire on hand, but it wasn't working with the fondant. That's when I thought of restringing the candy beads onto the wire. I think it worked nicely. I also used the floral wire to attach all the candy necklaces to the cake.
I know it looks a little busy, but it didn't seam quite so crazy in real life.
Thanks for all your ideas and suggestions. In the end I let her make all the calls.

*Also I have to tell you I tried THIS fondant recipe instead of my usual. I have to admit, I am in LOVE. If you are thinking of trying fondant you should give it a go. It was so easy and worked like a dream. Thank you Laura for sharing Peggy's recipe with me.
Visit thecsiproject.com

Wednesday, May 19, 2010

Cake Help?

This cute thing is having a birthday this weekend. I'm trying to decide what kind of cake to make her. We have a system in our family. We only celebrate birthdays with friend parties on our 3rd, 5th, 8th and 12th birthdays. In an effort in making birthdays special without all the craziness of a friend party I try and make a very special cake.
Even though her birthday is days away, we haven't picked a theme for her cake yet. I usually leave it up to my kids decide what they want, but she doesn't know this year. She has a million ideas but no specific idea. Really she would like anything that is pink and girly.

This was her cake last year. It's a candy cake. She LOVES Candy.
It was a hit.
Here is one idea I might try. I found it in a google search but couldn't find an owner. She is always carrying a purse around.
This cake from Woman's Day is another possibility.
Do you have any ideas? Have you seen anything cute and girly out there in blogland I should look at?

Sunday, May 16, 2010

Sugar and Spice


I threw a Sugar and Spice baby Shower for my Cousin yesterday. I really didn't get a chance to take good pictures of everything, but I thought I would still share what I had.

I served desserts that played off the sugar and spice theme.

We had ginger snaps.

Carmel dipped pretzels,

and Sugar Cookies.

I monogrammed them with a "S" which could stand for both sugar and spice, but actually stands for Sophia, the name of the new little baby.

I also served cinnamon chocolate cupcakes, but didn't get a picture.

I also didn't get a picture of our activity, but think it's worth mentioning. I'm not a fan of shower games. Instead I pulled out all my ribbon, buttons, clips and such and let everyone make a bow or two for little Sophia.

My gift to Sophia was this painting. I hope she likes it as much as I do.

I just wanted to make a little shout out to my amazing hubby who helped me clean and kept the kids away while I worked. He's always good to help, but this weekend was also his birthday. HAPPY BIRTHDAY BABY. Maybe he'll think it's all worth it when he's eating his yummy birthday cake.


LinkWithin

Related Posts with Thumbnails