Showing posts with label paper. Show all posts

Wednesday, March 6, 2013

{sweet} baby cakes

I love it when good things happen to good people, to much of life is unfair. After 12 years of waiting, one of my dear friends was finally able to start a family through adoption.  It was a miracle and happened suddenly, so some friends and I whipped up a shower over the weekend.

Of course I had to dress up the mantle for the affair.

First, I made this painted burlap banner.  It's a project I've wanted to try for a while and I love how it turned out. 

Once I was done with the banner, I had all this leftover paint and just wanted to use it on something. That is when I remembered some wood blocks I had from a past project. I used my western stamp set for the letters. It wasn't necessary but turned out to be a nice gift for baby.  

Does my sign look familiar? I used it HERE. It used to say FAITH but I altered the lettering a little. If you look close you can see what was erased and what I kept.

I got a new chalk marker since my old one ran out. I don't think I can tell you enough how much I love chalk art and these chalk markers. AMAZING.  

The drink station. We served a mint lime punch and pretty flavored water. 

I'm loving multi layered bunting right now. I found a package of oblong paper doilies that were perfect and altered my SPRING banner to spell out the new baby's name.  I think I put about 30minutes total into all four banners. 

Since it was a late-afternoon open house, we stuck with simple finger foods and a few desserts, including my favorite mint brownies. 

The invite. I was able to make these up in minutes using my FREE Silhouette Studio software. If you are like me and don't own photoshop it's a great way to design and print your own invitations. I've told you about it in the past, but wanted to give it another shout-out.

It was nice to celebrate something so wonderful and exciting.

HERE is a list of parties I link to.

Monday, February 4, 2013

Valentines Making Party


The last three years my sister and I have hosted a valentines making party. It's a perfect fit for us, we both love valentines and need an excuse to share our hoarded crafting supplies. 

 My sister came up with the cutest display for all the card making supplies. 


Doesn't this picture make you want to create something. 
 I have to say, the washi tape was the hit of the party. I got mine from Pick Your Plum. 

What is valentines without sugar cookies? 

Mini strawberry tarts, I think I'll share this recipe, so easy and so amazing.

 
It was so fun to see and steal everyones ideas. 


I decided to let my older girls come along this year, since they wouldn't stop begging. I was impressed with how serious Lydia was about it. She had a list of people she wanted to make a card for and didn't stop till everyone was done.  

Kate made a few cards but mostly enjoyed her time getting a sugar high and running around with one of her best friends. 

How pathetic is it that I was looking forward to a couple cans of this, since I stopped drinking it on a regular basis? 

Me and my sister Shelly (who is actually shorter than me but loves high heals). 

It was such a fun day, I can't wait to do it again.

I just got all our supplies for our classroom valentines in the mail. Hopefully I can share them later this week. 

Thursday, January 31, 2013

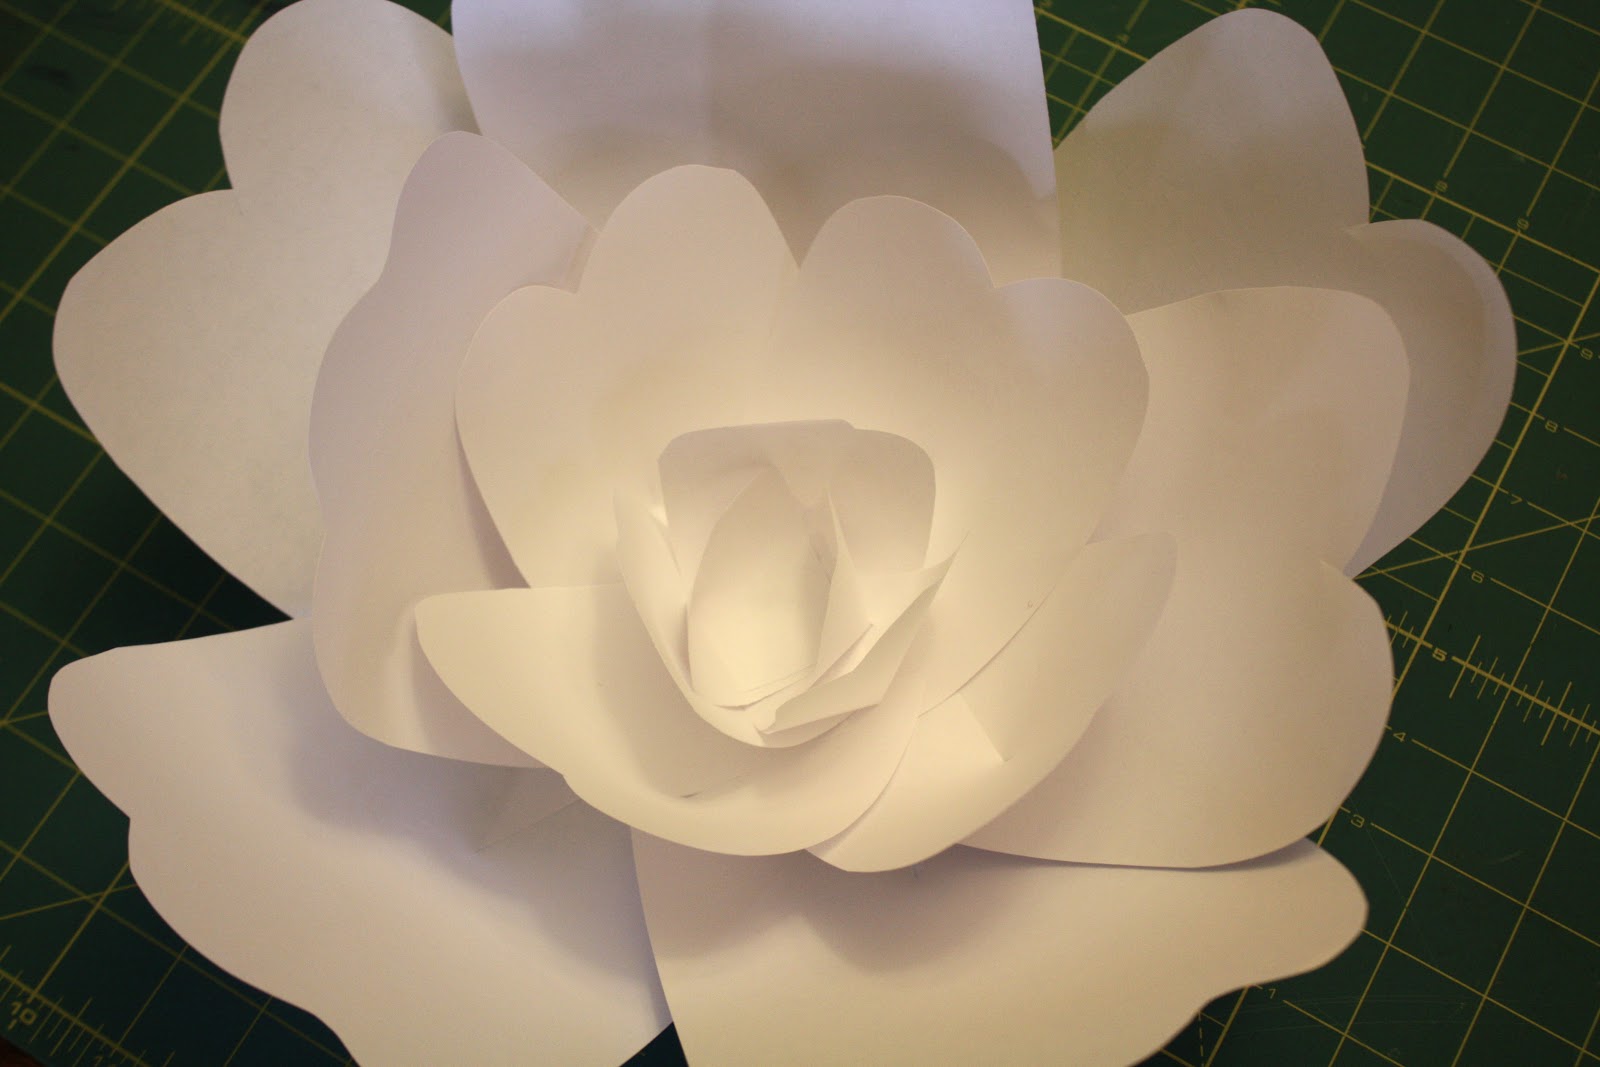
DIY giant paper flowers


I was asked to make a display table that represented faith at our stakes New Beginnings this week. 


I knew I wanted to do giant white flowers. Not only did they fit my theme perfectly, they also added a lot of drama.

I wasn't able to find any tutorials online that fit the shape and size I wanted so I thought I would share what I figured out in the process. 

They are super easy to make and only take a few minutes. You can make them Giant or small and with supplies you already have at home. I used plain old printer paper as well as some butcher paper from my husbands school. Even with just 8-1/2x11 sheet of paper you can still get a 24" flower. 

For this flower I used:
 6 sheets of 8-1/2x11 paper
scissors
hot glue

I cut four sheets of paper in half, one into 4th's and one into 8th's. 

 Then I cut the tops into a petal shape. Various shapes on top will add dimension. Next I cut a slit up the middle of the bottom. It was about 3" or so. 

Next I placed a blob of glue on one side of the slit.  

 Then I folded the one side of the slit onto the top of the other side. You want to create a cone shape with the glue holding it in place. 

 You can fold it over a little for a shallow bump or a lot for a deeper bump. You'll want to vary how deep of a cone you get with each layer. The outside petals will need a shallow bump and the inside need a deeper bump. 

 Once you've made all your petals for each layer, start glueing them together. I like to start with the largest petals and move in. For this flower I started with two petals and then added petals around it. 

I placed the glue on the top side of the bottom end of the petal and then stuck it under the existing petals.  

Once I had my outside petals done I glued the four middle ones together and placed them on the inside.  

 Then I did three of the smallest. I cut down two of the smaller petals and added them to the very center. 

Hope that makes sense cause they really are super easy and so fun. You could do any color and any size depending on what paper you have available. I think they'd be great for a wedding or big party. 


If you are interested the chalk boards, I got a giant board (2'x4') at Home Depot for $10 and had it cut down (for free) to fit my frame. Thanks to Cheri for the tip on chalk boards. I was then able to use the left over pieces for the other projects. 
The chalk board worked perfectly with my Chalk Markers. I see a lot more Chalk Art in my future.

LinkWithin

Related Posts with Thumbnails