Showing posts with label Silhouette. Show all posts

Wednesday, April 2, 2014

Frozen Birthday


My sweet Clarissa turned five last month and picked Frozen for the theme of her birthday. 

I was surprised when I went out to gather supplies for our little party that "Frozen" stuff is actually really hard to find. Luckily, her only real request was that there would be an Olaf piñata.  I knew I could make that and then mix in other items to fit the theme. 


She was thrilled with her Olaf piñata. I used the same method that I used to make Kate's Minnie Mouse Piñata, HERE. Sorry, I didn't take pictures of the process. 

The head was separate from the body (It does not hold candy).  I attached it with hot glue and then tied it to the body using string and a giant needle. I built up the mouth by layering pieces of cardboard cut into the shape. The nose is made from orange felt, and attached with hot glue. There is a great tutorial for that HERE. The rest of the details were cut from card-stock and attached with craft glue. 

For these kids it was the hit of the night!

I kept the decorations super simple with white pom-poms, a few clearance snowflakes from the party store, and white paper doilies.

Of course, I also whipped up a quick banner for the fireplace in Shilouette Studio. I know I say this all the time, but this program is FREE to download and easy to use. You don't have to own a Shilouette to download and use it.  

I also made her a crown, which she loved but only wore for a few minutes, plus pictures. 

The Cake! I ended up really loving this cake. Unfortunately, I forgot something. Do you see it?

I forgot to add Olaf's buttons! Oh well. Honestly, this little guy was a bit of a nightmare. The basic construction was fine. I followed this tutorial by Pucky Cakes, HERE. This was my first time using modeling chocolate, and all those little details kept melting in my hot hands. Arrrggghhh...It took three hours to make him. 


My favorite part of the cake was the snowflakes. They were made using royal icing and Sugar Gems. I got the sugar gems at Walmart in the baking department. I'm pretty sure I paid less than $2 for the bottle. 

I simply piped the snowflakes onto a cookie sheet that was covered in parchment paper. Then I sprinkled the Sugar Gem on top, while the frosting is still wet. *They need to dry for at least 24 hours* After that, they will slide right off the parchment paper. But be careful, they are very delicate! I would recommend making at least double the number you want. I broke several snowflakes in the process of transferring them to the cake. I printed off a couple sheets of snowflake images to place under my parchment paper as a guide, but actually liked my freehand snowflakes more. 

Here is my royal icing recipe:
3 egg whites
1 pound of powdered sugar
1/2- tsp cream of tartar
Beat until stiff, keep covered as it dries fast.

I used some reserved royal icing to glue the snowflakes onto the cake. 


It was a fun night with family, where Clarissa was cherished and spoiled. I'm glad we could make her feel special for at least one day this year.

For me, the intense game of Freeze Dance was the highlight of the party.

Friday, April 19, 2013

Library Reading Nook {a HGTV Home Fabric review}

When I was asked to review the new line of HGTV Home Fabrics from JoAnn's, I couldn't say yes fast enough. As soon as I saw the fun bold print they sent me, I knew what I was going to do with it. 
It's a project I've had on my bucket list for years, and was thrilled to finally get it done. 


I have a real library in my house. It is charming but TINY. Like seven feet by seven feet, you probably have a closet bigger than my library, tiny.

Despite being tiny, it has a 10ft ceiling with shelves running the whole way up. It may be full of old books, that no one wants to read, but it's still one of my favorite things about my house. 

Sandwiched between to bookcases on one of the walls is a bench, that has been begging for a cushion and some pillows. 

So I conquered my fear of pipping and zippers and finally gave this space the justice it deserves. 
This fabric turned out to be perfect for the space for two big reasons. One, it's super durable. I'm pretty sure it can handle all five of my kids. Second, It combines the neutral colors I have in the rest of my house with a fun pop of color, so the kids are drawn to it. 

In fact the kids can't get enough of it.  

Once I put in the cushion and pillows I knew we needed something on the wall. Since a frame would be in the way, I went with vinyl and this fun saying. I don't think kids can hear their loved enough. 

A big thanks to HGTV and JoAnn's for helping me get this done. You have to check out all the gorgeous prints and patterns they released.

Right now through May 4th, all HGTV fabrics are 50% off AND you can also use the following coupon with your purchase, for extra savings.


Wednesday, March 6, 2013

{sweet} baby cakes

I love it when good things happen to good people, to much of life is unfair. After 12 years of waiting, one of my dear friends was finally able to start a family through adoption.  It was a miracle and happened suddenly, so some friends and I whipped up a shower over the weekend.

Of course I had to dress up the mantle for the affair.

First, I made this painted burlap banner.  It's a project I've wanted to try for a while and I love how it turned out. 

Once I was done with the banner, I had all this leftover paint and just wanted to use it on something. That is when I remembered some wood blocks I had from a past project. I used my western stamp set for the letters. It wasn't necessary but turned out to be a nice gift for baby.  

Does my sign look familiar? I used it HERE. It used to say FAITH but I altered the lettering a little. If you look close you can see what was erased and what I kept.

I got a new chalk marker since my old one ran out. I don't think I can tell you enough how much I love chalk art and these chalk markers. AMAZING.  

The drink station. We served a mint lime punch and pretty flavored water. 

I'm loving multi layered bunting right now. I found a package of oblong paper doilies that were perfect and altered my SPRING banner to spell out the new baby's name.  I think I put about 30minutes total into all four banners. 

Since it was a late-afternoon open house, we stuck with simple finger foods and a few desserts, including my favorite mint brownies. 

The invite. I was able to make these up in minutes using my FREE Silhouette Studio software. If you are like me and don't own photoshop it's a great way to design and print your own invitations. I've told you about it in the past, but wanted to give it another shout-out.

It was nice to celebrate something so wonderful and exciting.

HERE is a list of parties I link to.

Tuesday, February 26, 2013

double-sided adhesive sheets, glitter and a shamrock

When the nice guys at silhouette asked if I wanted to try their new double-sided adhesive sheets, I jumped at the chance. 

My girls love glitter. In fact when I pulled out the glitter to test it out, they all went crazy and started grabbing paper and glue before I could stop them. We're looking forward to some fun projects in the future like sparkly easter eggs or halloween signs. I didn't have any of the super fine glitter, but what we had worked fine for now. 

We decided to make a little sign for St Paddy's. 
We started with a clover, sticking it right to a little canvas mat we had. 

We covered it with green, then added {LUCKY} to the corner. Honestly, the sheets were a little harder to handle than I anticipated. I was in a hurry and with these you want to take your time. Once they touch a surface, they can't be moved. So, my C may or may not look a little like a G.

Despite that I am still a big fan. You would never be able to accomplish the same look with glue. I absolutely love the way it sparkles when I walk past. 

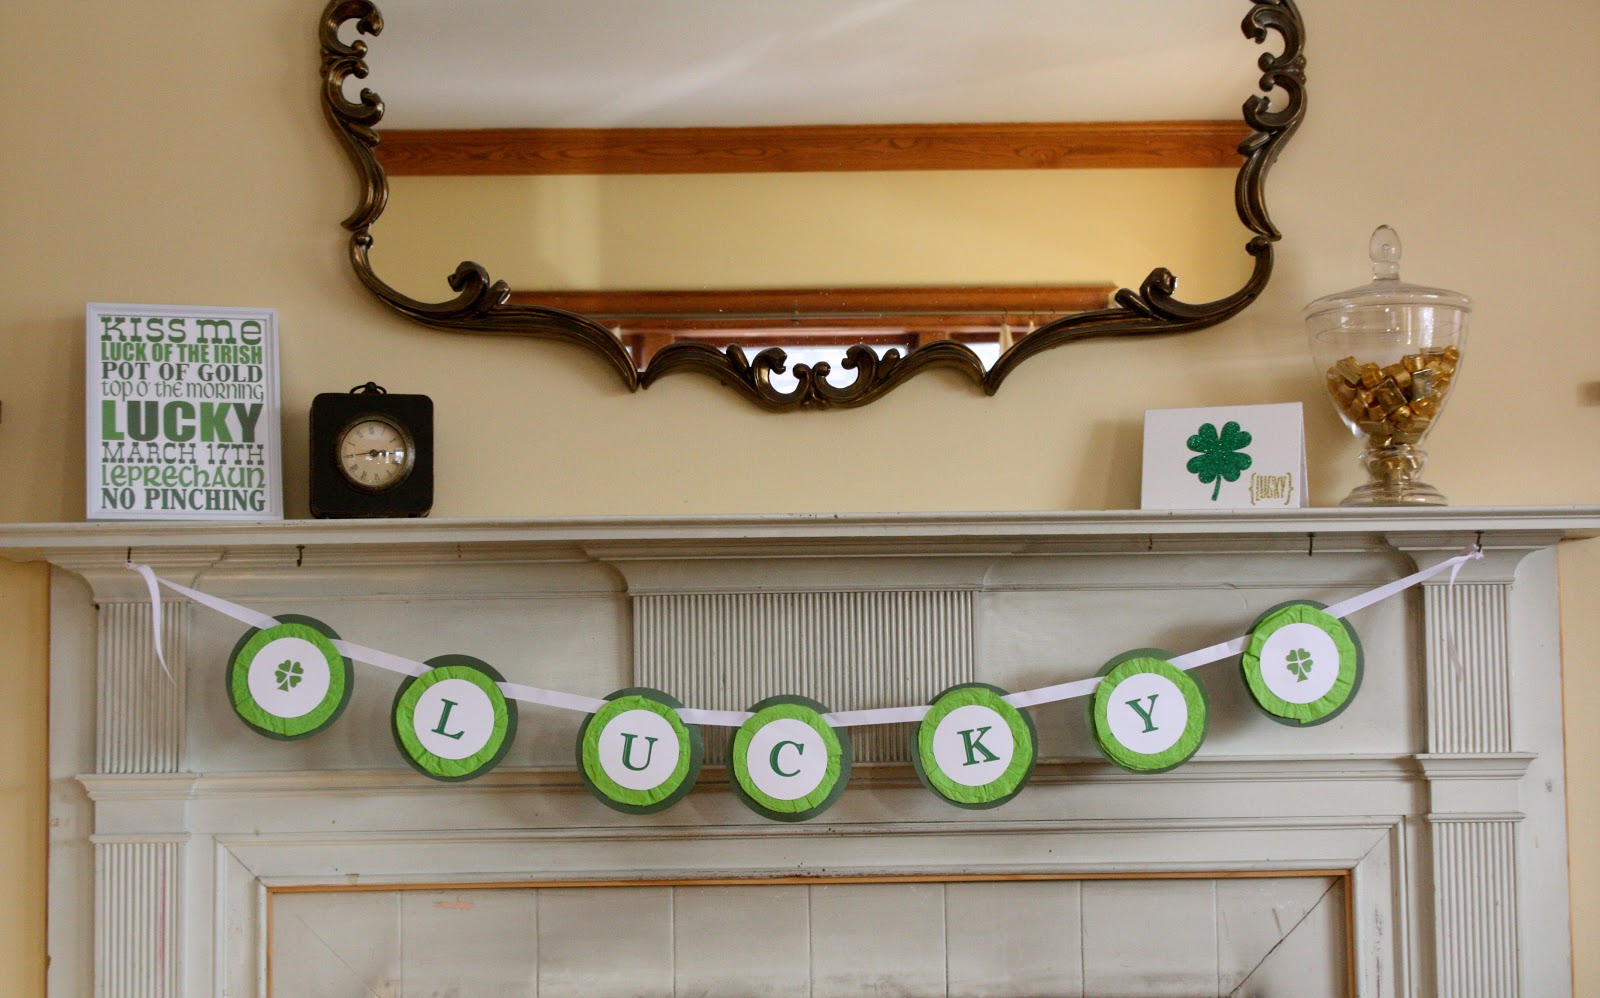
I placed it next to our Pot O' Gold.

subway art from HERE
lucky banner found HERE

And since I am way behind on my Thank-you's for all help and gifts for the baby and made a few cards too.

A few recommendations, take your time, don't use this when you are in a hurry. Use fine glitter, it will fill in better. Also, I would cut with a little longer blade length then recommended.
Thanks Silhouette for another great product. 

Thursday, May 3, 2012

custom invitations

We're getting ready for my daughters 8th birthday in a couple weeks and thought I'd share the custom invitation I made for her. I was inspired by THIS invitation and loved how ours turned out. 
As cute as the inspiration was I decided to go the DIY route not only to save money but now I can do matching menus, place cards, etc. 
I made the invitations in Silhouette Studio. Yes, it is the software I use with my Silhouette machine, but anyone can download it for free HERE.  I love this program. It's so easy to use, I basically taught myself by pushing all the buttons until I understood what I was doing. All the fonts on you computer will automatically be transferred to the program and any additional images you want can be downloaded for 99¢ a piece. I downloaded the background, flowers, and tea cups for this project, spending a total of $4. 
Another great tip if you want to print at home, is to print in the photo paper setting. It will give you a crisper and brighter image. 

I've had so much fun searching with my daughter for the perfect tea cups and accessories. Hopefully it will all come out as planned. 

Wednesday, April 18, 2012

Rapunzel's birthday

We celebrated Kate's 5th birthday last month. Despite being sick, I had to pull something together since 5th birthdays are one of the few birthday's we celebrate with a friend party. She's patiently waited 2 years for this and won't have another friend party for three years, so I wanted to make it as special as I could.

As guests arrived they recieved a purple glitter crown. (found at JoAnn's $1 bins)

Then everyone was sent outside to develop their artistic talents in sidewalk paintings.  

 I loved this one of rapunzel and her floating lanterns. (please ignore the rust stains)

 Next we beaded necklaces.

I was so worried about entaining the girls, but really they just enjoyed playing outside together.  

After working up and appetite, we went inside for lunch, presents, cake and ice cream. 
This was one of the hardest cakes I've ever done. I ran out of time and wasn't able to do half of what I wanted to. 

I was so upset, and felt like a huge failure until I saw her reaction. 

She doesn't care that the tower is going to fall any second. 

the decorations:
Thanks to my silhouette, these banners were a breeze to make. 

I loved the look of the chandelier.

We hung several of these Flynn Rider wanted posters inside and out. You can find the image HERE.

I forgot to get a picture of these all wrapped up, but here is what we sent home in a goodie bag. 

I have to give a huge shout out to my mom for helping me make the amazing Rapunzel dress. 
I couldn't have done it without her. 

I had a really complicated idea of how to make it, luckily my mom has years of experience and showed me a much, much simpler way of putting it together. Sorry no pattern- we totally winged it. 
Honestly this dress was my favorite part of the party and I think it may have been Kate's too. 

I have to laugh, I had created this great plan years ago to make my life easier and only celebrate 3rd, 5th, 8th and 12th birthdays with friend parties. Funny how all three girls ended up with a friend party this spring. I was so  sick for the 3 year old's birthday that I had to cancel it, but I'm hoping I have the energy to pull off the 8 year olds next month. 

LinkWithin

Related Posts with Thumbnails