Showing posts with label Jewelry. Show all posts

Tuesday, May 11, 2010

Jewelry Makeover

I bought some pearl necklaces for my mom, my sisters and myself last week. The plan was to embellish them and give them for gifts on Mother's Day. Of course that didn't happen because I ran out of time. Instead I finished them today. Within an hour, I made flowers for the four necklaces and a ring. I love the way they look.
I added a couple more flowers to mine, I like things grouped in threes.
I bought the pearls at Forever 21, so they aren't real, but I thought they were still good quality for the $3.80 price tag.
To make the flowers I twisted the fabric and rolled it, like I was making a snail with play-do. I used a hot glue gun to hold it in place. Then I glued a safety pin to the back. Once it was dry I pinned the flowers to the pearls.
If the flowers go out of style, I can take them off.
I also mad a ring. You can follow Vanessa's tutorial for her flower ring HERE.

Wednesday, April 28, 2010

Mother's Day Bracelet {for Grandma}

I've given corsages to my Mother and Mother-in-Law to wear on Mother's Day in the past. This year I wanted to do something a little different.

I hope you aren't sick of my Shrinky Dink obsession, because I used them again to make this fun bracelet for my Mother-in-Law. {She doesn't even know I have a blog so I don't have to worry about ruining the surprise.}
I did the names and my kids did the artwork.
The process is pretty similar to the custom straight pins. First I drew an image.
After coloring it and cutting it out, I punched a nail through the top.
Then I Baked it, following the directions on the package. Immediately after baking I removed the nail.
Once it cooled I added a jump ring to the hole and attached it to my bracelet.
I doubt my Mother-in-law will wear this after Mother's Day, but I think it could be a fun tradition to add new charms each year. I think the fuller it gets the better it will look.

Sunday, March 28, 2010

Upcycled Bracelets


I bought this handbag at the thrift store a while back. I loved the color. The shape of the bag wasn't my style, but I knew I could do something else with it.
These are my creations.

Other than the bag the only supplies I needed were a few beads, a needle and thread.

My favorite thing about repurposing things is that most of the hard work is done for you. I was able to use parts that were already finished at the edges making my job easier.

Now I just have to decide which one to keep and which to give away.

Here is how I made them:

For the Flowery Bracelet:

I started by making a leather band for the base. I folded in the sides of the strip of vinyl, tucked under the edge and sewed it up the middle. I didn't use pins or an iron I just held it in place as I sewed.
Then I sewed seams up the sides to flatten it out.
To make the flowers I cut five petal shapes. With the right sides together I sewed around the curve. Then I flipped them right side out.
I hand sewed the petals together. Sewing long stitches and then pulling them tight created the gathering at the center.
After pulling it tight I sewed the two ends together to make the flower. I sewed it into place on the band and used a wood bead for the center.
To make the rosettes I just rolled up a small strip of vinyl and sewed it together. I sewed it up by running a my needle back and forth through the middle and bottom.
Once I had all my flowers in place I added more beads to fill in gaps. I tucked the ends under and stitched them up. I used a Dritz snap set for my fastener.

For the ruffled bracelet:
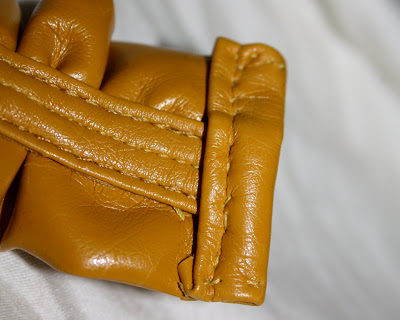
I started with a strip of vinyl. I folded in the sides, and sewed two long stitched seams down the center.
Then I pulled on the bottom (bobbin) threads. This creates the gathers. I gathered the band until it was the length of my wrist.


I cut out the the binding on the purse.

I then sewed it down the middle covering up the unfinished edges from the gather.
I finished the ends by sewing little strips of the vinyl on.
I attached this box clasp from an old necklace by sewing it into place.

For the braided bracelet:

I used the remaining three bindings from the purse to make this piece.
I lined them up and sewed the tops together.
I braided them and sewed the other end together.
Then I used this piece...
to finish off the ends.
The last step was sewing on a toggle clasp.
Here is a list of parties I link to.

LinkWithin

Related Posts with Thumbnails