Thanks for all your sweet comments about our ruffle dresses. I'll do my best to explain how I made them.
I hope you all aren't too disappointed, I can't tell you how I made the bodice because I used a pattern. It's the same pattern I used Here, Here and Here (newlook #6881). I'm not usually a fan of patterns. They can be expensive, they are hard to read, the sizes are off, etc. But, having a few basic patterns as a starting point can be invaluable. I got this pattern for like $3. You could use the top of any dress pattern for this. I think it would look just as cute with sleeves. Just cut it off so that it will have an empire waist.
The length and size of all the other pieces will vary depending on the size of your child.
First you'll need an underskirt. I used a lining fabric for this piece. I measured from the chest down to just under the knee for the length. I decided the width by measuring the width of the bodice and adding a few extra inches (8-10") to give her room to move.
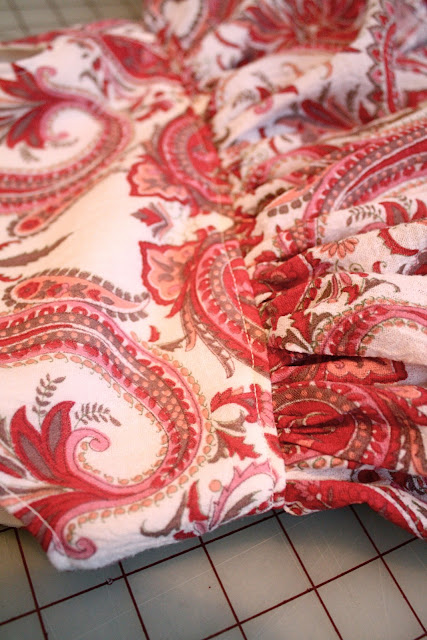
Next you'll need the ruffles. I cute two long strips of fabric. I made the length about 2-1/2 times the width of my underskirt. For example the underskirt of my 18 month olds dress was 28", I cut the ruffle pieces 80" long. It doesn't have to be exact, just enough to get a good gather. The height was determined by the length of the underskirt as well. You'll want the ruffles to overlap by about 3". Because the length of the underskirt was 11", I cut my ruffles 7" each.
Now you're ready to start sewing.
I hemmed the ruffle pieces and serged the other end. A zigzag would be fine.
Then I gathered them. The simplest way to gather is to sew your longest stitch across the top and then pull on the bobbin threads till it's the length you want. You want it to be the same width as your underskirt. Here is another trick for gathering, I just learned.
Next I drew a line onto my underskirt showing were I was going to place my first ruffle. Since my ruffle was just under 7" after being hemmed and I wanted it to hang over the edge a little, I marked my line at about 6-1/2 inches up from the bottom.
Then I pinned it into place, lining it up with my line, and sewed it down.
Next I pinned the top ruffle into place lining it up with the top and sewed it down.
Now, since the underskirt is still a little wider than the bodice I gathered it a little more.
It doesn't need much of a gather just enough that they are the same width.
Now pin and sew them right sides together.
After finishing my edges, I did a topstitch around bottom of the bodice.
I forgot to get a picture, but I finished the edges of the back panels by serging them. You could also use a zig-zag.
Then I sewed up the back leaving room for my girl to slip in and out of the dress.
I had my girl try on the dress to see how much room I had for buttons. Then I folded over and pinned the edges of the opening. I tacked the fold down at the bottom of the bodice and marked out my button holes.
The buttons and button holes will hold the rest of the folds in place. HERE is a great tutorial for buttons and button holes If you are scared like me.
Let me know if I forgot anything. I probably did.


13 comments:
Oh, so adorable. I love that the dresses are fully lined.
Absolutely precious & sweet! I'm hoping for a daughter some day, for this exact reason! :)
Love this dress, but am not a good gatherer.
I don't think the link is working on the gathering tip :) I need all the help I can get, can you let us in on the secret?
These dresses are adorable. I wish I was better at sewing! Looking at all of your beautiful things, gives me inspiration to learn more. :)
This is brilliant. I love that you don't have to match up side seams on the ruffles. I love it. Thanks so much. Can't wait to do one and link up with you again. Thanks.
I can't think of anything you left out! This tutorial looks great! Can't wait to try it and link up, also.
This is SUCH a pretty dress! And practical, too! I linked to your tutorial over at Craft Gossip Sewing:
http://sewing.craftgossip.com/tutorial-tiered-ruffle-dress-for-girls/2011/01/23/
--Anne
Adorable! Just tonight, my husband just gave me money to buy a gathering foot. I think I know what I'll be making with it first!
Beautiful, beautiful, beautiful! I am in love with these sweet dresses. Wonderful work.
I absolutely loved this dress and ofcourse ur models make the dress super beautiful!!..Great job n thanks for sharing this tutorial..will try to make it for my daughter...
Love this! I so need to start sewing again!
http://jamesandleighann.blogspot.com/2011/10/bethanys-new-fall-dress.html
Hi! I copied this dress and posted about it! See above link!
Post a Comment