

I've been dying to make my kids some mail pouches ever since I first saw them. The original one is from Pottery Barn kids.

Using scraps of fabric I had on hand, I put together four different bags for the kids. Each is lined with the accent fabric.

To make your own here is what you'll need:
fabric, craft interfacing, heat and bond, matching thread and 2 buttons
First cut out all your pieces

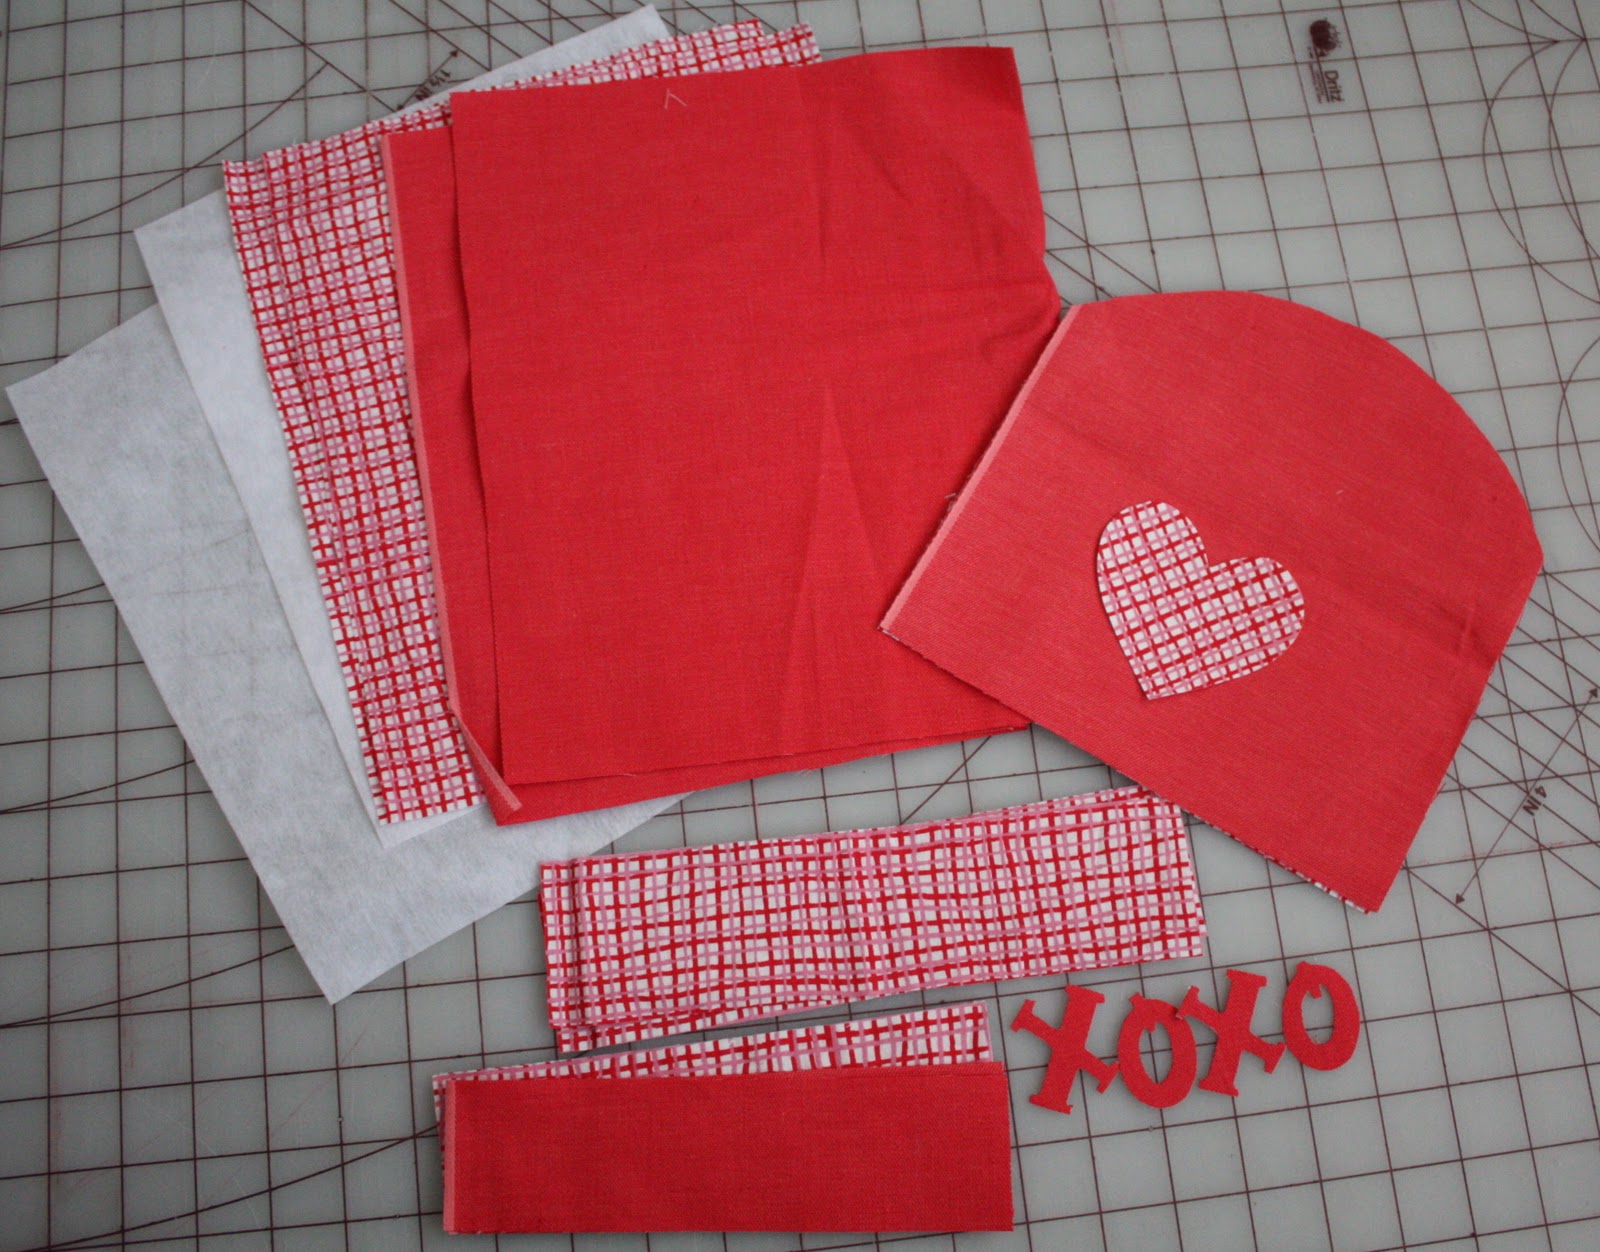
for the body:
2- 9x11'" of outer fabric
2- 9x11" of lining fabric
2- 9x11" if fusible craft interfacing
for the flap:
1- 8x8 of outer fabric
1- 8x8of lining fabric
You can round the end like I did by tracing a bowl.
for the straps:
2- 2X8" of outer fabric
2- 2X8" of lining fabric
for embelishments:
2- 2x9" strips
a heart
2-x's and 2-o's
You don't have to embellish like I did, do it how ever you want. To make attaching and sewing on the pieces easier I used heat and bond on the back side of the fabric. Then, I drew what I wanted and cut it out.
Next, sew the straps right sides together with a 1/4" seam leaving the top open. Trim the corners. Flip right side out, iron and top-stitch the edges. Add a button hole at the bottom.

Apply embellishment to the front of the flap and stitch it down. Then sew right sides of flap together with a 1/4" seam, leaving the top open. Clip the curved edge of flap. Flip it right side out, iron and topstitch.

Before assembling the body, apply interfacing to the back side of outer fabric. Next apply all the embellishments to the front and back of the outer body pieces. I placed my strips 3" above the bottom of the bag. Sew everything down and attach buttons just above the strip or about 3-1/4" above the bottom of the bag.

Sew the rights sides of the outer pieces together. Then sew the right sides of the lining fabric together leaving a 4" opening in the bottom.
Now, box the corners of both bags by pinching out the corners to create a triangle (see picture below). Using a clear ruler mark a line 1-1/4" down from the point. Make sure your seam is in the center when you draw your line. Then sew over the line. Trim the excess fabric.

When you're done with that you should be able to turn them right side out and stand them up.

To assemble the bag pin the straps 1/2" from the side seams and the flap centered in the back. Stitch across the top of the back with a 1/8"seam to hold everything in place.

Next, stuff the outer bag into the lining bag with right sides together.

Pin and sew the top together with a 3/8"seam.

Now pull the outer bag through the hole in the bottom of the lining.

Topstitch around the top of the bag.

Your Done.

We've had ours out for a couple days, the kids are already enjoying giving each other love notes.

I've got several little notes and gifts planned to give them here and there over the next month.


37 comments:
You know what? Those are just stinkin' cute...that's what.
I have had my eye on those from PBK forever now...I don't have the talent to do what you did....they look fantastic!
My guys would have loved these when they were little!
Thanks for sharing and I love your cheerful blog.
Janet xox
Love, love, love them. So sweet!
Oh these are so cute! For the last couple of years we have had mailboxes in our house for the month of February...but they aren't nearly as cute as those! It is fun to leave love notes and treats for each other all month long rather than on just one day.
i have to say that my mom got me the PB one for my classroom, but i LOVE yours. i wish i lived close enough for you to give me lessons. you make it look so easy.
Adorable! I have wanted to make them too. I like yours even more than the originals!!
I shared your link on my TT&J FB page :)
xox
Jen
Super cute! I have always wanted to make these, too! Great tutorial!!
These are awesome. I've been planning a similar project for my family.
I did notice the new side bar. It looks like LOVE... I want to make these now.
Love it, your kids must think they are great. Hope you guys feel better soon.
Cha Cha
i've had these on my list since i saw them on john and kate plus 8, i'm so excited you did a tutorial for them. my son is only 2 months old so he wont appreciate it till next year but i'm excited about making him one anyway lol
lisasalwayshomemade.blogspot.com
LOVE these! You should submit them to Knock Off Decor - it's a new site featuring creations inspired by designer items.
SO stinking cute! Can you do a button hole tutorial? I am having serious issues with making a button hole.
querida amiga, hoy he conocido tus trabajos y solo puedo decir que admito todo lo que haces, tienes un gusto esquisito, todo es maravilloso al igual que tu encantadora familia, espero con ansias seguir visitandote, un cariñoso saludo,kodama
I wanted to let you know you've been featured for Craftify It Thursday on Life with the Lebedas Blog. Hope you'll swing by and grab the feature button. Your also welcome to link up other crafts!
http://lebedafamily.blogspot.com/2010/01/craftify-it-thursday-valentines-edition.html
Have an awesome Thursday!
Jennifer
Thank you SO much for sharing this idea. I am going to make them for all my home daycare kids too! Fabulous tutorial.
Visiting from Fireflies & Jellybeans "Show Off Your Stuff" link party!
I love this! What an adorable project!
So, so cute! I wish I could sew and make this. I will take a lesson someday! You did a fantastic job!
Yet another amazing project. It makes me want to write love notes. But, I have nowhere to put them. :) Need some of those!
I am in love with this! I'd love for you to come link up at Fun For Kids Friday.
http://smilemonsters.blogspot.com/2011/01/fun-for-kids-friday.html
Jo @ SmileMonsters
What a fun idea!!! And the little sack is sooo cute!
I linked to your tutorial on Craft Gossip Sewing:
http://sewing.craftgossip.com/tutorial-valentines-mail-sack-for-a-chair-back/2011/01/14/
--Anne
Those are so lovely. I saw pottery barn's version and I thought that someone should come up with a tutorial on how to make a similar one.. and then I find this on your blog! Great :)
Great idea! Thanks for joining Get your craft on Thursday at Life As Lori!
I'm having a Valentine Party that will be up up until 2-14-11. I would love for you to join me!
http://lifeaslori.blogspot.com/2011/01/valentine-party.html
Lori
Great idea! Thanks for joining Get your craft on Thursday at Life As Lori!
I'm having a Valentine Party that will be up up until 2-14-11. I would love for you to join me!
http://lifeaslori.blogspot.com/2011/01/valentine-party.html
Lori
Yours turned out waaayyy cuter than mine! I love your heart shaped buttons!
-Mariesa
http://tencowchick.com
I just made one of these and blogged about it:)
Come take a look if you get the chance - and feel free to take a "featured" button from my sidebar if you want. Thanks for the great tutorial!!
http://craftyladylindsay.blogspot.com/2011/01/valentines-day-chairback-mail-pouch.html
Lindsay @ Diary of a Crafty Lady
What cute chairbackers, I think they are so sweet! I made some Valentines pouches as well out of vinyl. It has already been such a fun tradition, you can see mine here, http://ladybirdln.blogspot.com/2011/01/valentines-day-chair-backer.html
Those pouches are just sooo cute. Love them! They are ideal for gift giving.
Oh my gosh! These are the cutest things ever! My daughter would flip! Of course she would probably use it as a backpack! Thanks for the tutorial! I would love for you to link up to my Sew Crafty Party & Giveaway!
http://wildflowersandwhimsy.blogspot.com/2011/01/sew-crafty-saturday-adventure-date.html
These are amazing!! Thank you so much for sharing the tutorial. I hope I get to make some for my kiddos!
Thanks for linking up to Take-A-Look Tuesday over at Sugar Bee Craft Edition - I featured you today! Mandy, www.craftedition.blogspot.com
This is a very amazing idea! I love it. The color is so seasonal!
Thanks so much for the tutorial, I was loving those PBK mail bags but couldn't justify the cost, I was excited when I found your tutorial, which also meant I finally had a reason to use the owl fabric I loved. Here's my take on your mail bag. Thanks!
http://tungandsara.blogspot.com/2011/01/valentine-mail-bags.html
Such a great little project. With two boys I rarely get to make 'cute' things. *sigh* These were the perfect quick project and they went together so quickly. Thanks for taking the time to post your tutorial - my boys are very happy campers.
http://www.clairemeldrum.ca/?p=833
Thank you so so so much for this. I have been wanting to make these for so long now and this will give me the extra push to do it! Thank you!
Thank you for this great idea! I just made two of them for my kids. I used non-valentine fabric so they can be used all year. The directions were very easy to follow - thank you!!
Post a Comment