

When I finally decided to redecorate my son's neglected bedroom there was only one choice for a theme, Star Wars. He wouldn't have it any other way. I've been dragging my feet on this project wondering how I was going to tastefully accomplish his dreams. Then I found the Star Wars collection from Pottery Barn.

I was so excited to find some pieces that my son wouldn't outgrow overnight and weren't too cheesy.
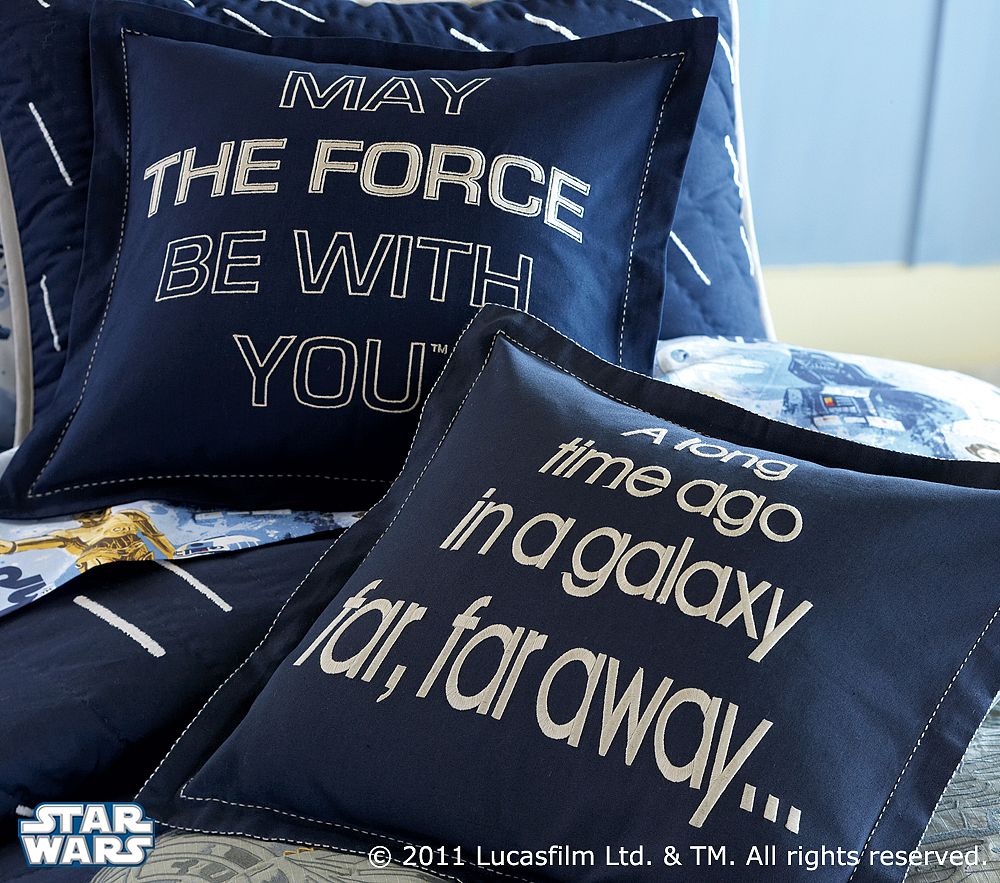
I especially liked the pillows and knew they were something I could tackle on my own.
Here is the my version I made for a guest post on a knock-off series.

Even though I had bought supplies to finish the room, it has sat untouched all these months.
This week I decided I better get it done before his birthday at the end of the month. I finished all the bedding, including this fun pillow.

With an envelope closure and appliqued letters it was super simple make.

Details make the difference in a good knock-off. The pillow wouldn't have been the same without adding the pick-stitch boarder

This Knock-Off can be easily changed to fit any decor. PBkids is famous for it's personalized accessories. I would love to make one in pink with my daughters initials on it.
To make your own pillow you'll need:
-a printer, paper, a pencil
-outer fabric- 1/2 to 1 yard depending on size of pillow
-white or contrasting fabric
-wonder under or Heat N' Bond
-clear ruler
-thread, pins and sewing machine
-chalk pencil
-pillow form, mine was 20 x20
Step 1: print and cut out lettering
I typed out the saying in a word document. I used the Star Jedi font found HERE (size 190).

After printing the document I cut it out and traced it backwards onto my white fabric that was already treated for applique. Then I cut all my fabric letters out.
Step 2: cut out pillow front and back.
Since I was working with a 20 x 20 pillow, I cut a 22 x 22 square for my front and two-13 x 22 rectangles for the back. What ever the size you make, add an inch for the boarder and and inch for your seams.

Step 3: add lettering to the front.
Using my clear ruler, I laid out my lettering so it would be centered. Once it was all in place, I ironed it down. I put a towel under it so I could iron on my table, since it wouldn't all fit on an ironing board.

Step 4: stitch down lettering
I used a zig-zag stitch because it reminded me of the embroidery on the original. A straight stitch would be easier. Use a short stitch to avoid going over the edges.

Step 5: adding the back
I hemmed one side of each of the back panels. Then with right sides together I places the first panel on top of the front piece. Make sure the finished edges are on the inside of the pillow and your edges line up.

Next I put the second back panel down, overlapping the first. Pin and stitch around the edges.

Step six: adding the boarder
I flipped the pillow right side out and pressed all my seams and corners. Then I used my ruler again with a chalk pencil to draw a line one inch from the sides around the entire pillow.
Next I sewed over the chalk lines first with navy blue thread then again with a double stitch in white.

When your done slip your pillow inside the opening.

* I made my own pillow form using a standard $4 pillow from Walmart. I measured 20" over and cut the pillow in half then stitched up the opening. It was a lot cheaper than any other square pillow forms I found.


6 comments:
Super cute, great job!
My son loves Star Wars he would flip over this.
http://fortheloveofwelleverything.blogspot.com/
I am in the process of gathering stuff for a star wars room here. Thanks for the cute pillow idea!
Just Another Day in Paradise
Looks good. You really can just make one for Porter for Christmas...
Agh! Love!!! The thick striped quilt is fabulous. My son's star wars room has been at a standstill and I need the motivation to finish! This may do the trick. Your work is inspirational, as always!
Did you make the striped bedspreads? I would love to buy or make the same.
Thank you so much for this tutorial. I'm using it to make similar pillows for my son's Star Wars room. Appreciate you sharing the font as well. Thanks!
Post a Comment